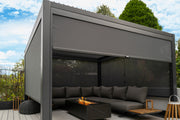
How to build a pergola on a deck
A pergola can be a brilliant addition to any decked area, providing a shaded spot for you to sit and relax during sunny days. Not only does a pergola add aesthetic appeal to your deck, it also increases the usability of the space.
With a pergola overhead, your deck becomes a comfortable, multi-purpose area you can enjoy more often. With the following guidance, you’ll soon have a beautiful pergola in your garden to enjoy year-round.
FREESTANDING OR ATTACHED?
When installing a pergola on your deck, one key decision is whether to build a freestanding or attached structure. Though they serve similar purposes, important differences exist between the two styles.
Attached pergolas connect directly to your home’s exterior wall, seamlessly extending your living space outdoors. This creates a cohesive aesthetic and convenient shaded transition between indoor and outdoor areas. This style of pergolas is ideal if you have a door opening directly onto a patio space.
Freestanding pergolas stand on their own, independent of other structures. This versatile style can be positioned anywhere in your garden or patio to carve out distinct outdoor “rooms”.
You can position freestanding pergolas to follow sunlight patterns or maximise shade based on your needs. With more flexibility in placement, freestanding pergolas provide customisable relaxation nooks and they’re perfect for adding to an existing decked area.
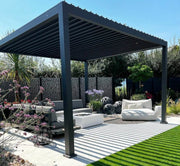
While constructing a freestanding pergola on the ground is relatively straightforward, building one on an existing deck requires some extra planning and precautions. Here are key factors to keep in mind:
Firstly, you need to check that you have planning permission if you need it. Your deck and the height of your pergola can’t exceed 250cm without planning guidance, so check you have permission if your chosen design is taller than this.
You also want to prioritise safety, ensuring that the deck can support the weight of the pergola. A deck-mounted pergola will endure the elements, make sure the materials you’re using to attach it, and the surface it’s being drilled into, has been treated for rot resistance and longevity.
You also want to be mindful of height – the increased height of an elevated pergola will mean more force from winds and storms, so make sure the structure is securely bolted down to prevent it lifting.
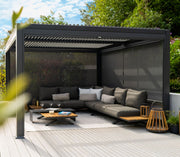

DESIGNING & INSTALLING YOUR PERGOLA
Don’t pick up tools until you’ve mapped out a solid deck pergola plan. First things first, scout where you’ll build your pergola and the dimensions you have to work with. The bigger your pergola blueprint, the stronger your beams need to be to allow ample overhead support, so make sure to select materials that can handle the structural stresses for your custom span and size.
Once you’ve chosen and assembled the main posts and beams of the pergola, it’s time to anchor the structure securely to the deck. This critical step helps ensure your pergola can withstand wind, rain and other elemental forces.
Start by determining where the pergola posts will be positioned on the deck. Mark the spots clearly to guide the placement then lift the pergola and position the bottom of the posts at the marked locations. You can then drill the posts in order to bolt them into the deck joists below the surface boards.
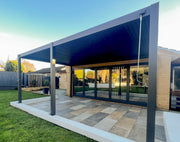
FOCUS ON STABILITY
Make sure you bolt into the bones of the deck by attaching pergola posts into the hidden joists and framework, not just the surface boards. This will prevent the whole unit from detaching.
For extra stability, you can also use angled knee braces attached to the posts and bolted to the deck joists. You can add decorative post caps to cover the hardware, or add reinforcements with railings between posts to boost structural integrity.
Bear in mind that heavy roofing materials spell danger. Heavy roofing elements like clay tiles or slate can add substantial weight to the top of the pergola. Opt for lighter elements like lattice or louvered roofs to avoid excessive weight up top.
Lastly, when furnishing your new sheltered space, aim for symmetry to maintain stability. Any heavier features like furniture should be positioned around the base – avoid positioning everything in one area.
Following these tips as you design and build your pergola will maximise sturdiness and structural integrity.

Explore our range of pergolas and furniture collections, to create your perfect summer set-up.

